 Auricast Manuals
First-Time Setup
Setup is done once on the box, with the auricast-setup command, plus a few lines in the settings file. Everything else is done afterwards in the browser.
Run sudo auricast-setup check at any point. It lists each setting that is missing and ends with ready when you can start.
The Settings File
/etc/auricast/air.env holds the box's settings. Open it with an editor as root. The ones you need first:
| Setting | What it does |
|---|---|
AIR_USER | The user playout runs as. Leave it as auricast. |
AIR_LIBRARY | Where the music is on the box. /srv/music by default. See Library Storage. |
AIR_STATION | The station folder: clocks, week grid, categories, users, settings. /var/lib/auricast/station by default. |
AIR_LOG | The as-aired log, which reports and play history come from. |
AIR_OUTPUTS | Where the audio goes. See Sound Devices, Outputs And Streams. |
AIR_WEB | The address the screens answer on: 0.0.0.0:8443 by default, HTTPS on port 8443 on every network connection of the box. |
AIR_BACKUP_DIR | Where the daily backup goes. |
AIR_EMERGENCY | A local folder of music to fall back on when the schedule cannot play. Optional. |
Changes to this file take effect when the service restarts:
sudo systemctl restart auricast-airNever Put A Password In A File
Passwords are not written in air.env. They are stored encrypted, one by one, with auricast-setup secret.
| Secret | Used for |
|---|---|
nas-password | The login for a music share set in air.env. |
stream-password | The Icecast source password, used by every stream that has no password of its own. |
alert-password | The password of the mail account that sends alerts. |
Store one like this, using its name:
sudo auricast-setup secret stream-passwordType the secret, press Enter, then Ctrl-D. It is not shown on screen. It is encrypted with the key of this particular box, so a copy of the file is useless on another machine. Restart the service afterwards to use it.
Create The Station
Auricast builds a station from a PlayIt Live backup. Copy the .db backup to the box and run:
sudo auricast-setup import /path/to/playitlive.dbThis creates the station folder with your clocks, week grid, categories, markers and play history, and writes a report of what it did into the folder as import-report.md. Read that report: it tells you what came across and what did not.
If a station folder is already there, it is not overwritten. It is renamed with the date and time beside it, and the track tag and loudness caches are carried over so the files do not need to be read again. You can import again if the first attempt was not right.
Create The First Admin User
The screens need someone to sign in as. Create the first user as an Admin:
sudo auricast-setup user add <name> adminIt asks for a password twice and does not show it. Roles you can give here are operator, program_director and admin. Further users, including Traffic Managers, are added later in Setup → Users & Access (see Signing In For The First Time).
Choose a long password. Auricast follows the FCC's rule for broadcast stations: at least 15 characters, no dictionary word with numbers added, and nothing containing the user's name, the station's name or "auricast". Several ordinary words run together make a good passphrase. A shorter password is accepted here, but the user is made to change it the first time they sign in.
Optional: Alert Mail
To have Auricast mail alerts (an output down, silence, a library share lost), set ALERT_TO, ALERT_FROM and ALERT_SMTP in air.env and store the mail account's password as the secret alert-password. Mail uses an SMTP submission server with STARTTLS. You can also set mail in Setup → Email once the screens are running, and the values saved there win.
Start It
sudo auricast-setup enableThis starts the service now and at every boot. Run sudo auricast-setup check once more. It should end with ready, show the service as enabled and active, and report the secrets you stored.
Register The Station
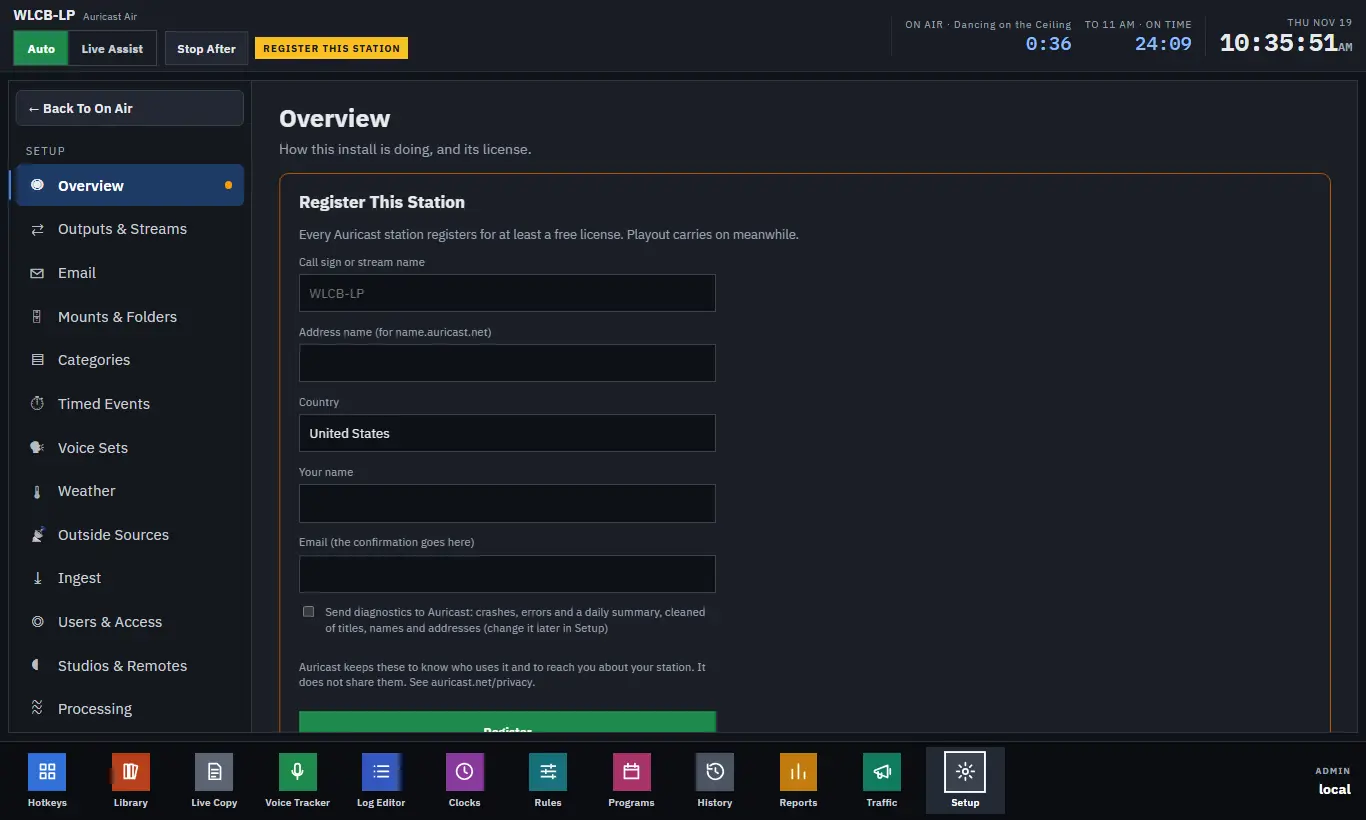
Every station registers, free of charge, before its first broadcast. A box that is not registered and has never broadcast does not open its outputs. The screens show Register This Station instead.
- Open the screens in a browser (see Signing In For The First Time).
- Fill in the call sign or stream name, the address name, your country, your name and e-mail.
- Choose whether to send diagnostics. This is off unless you tick it, and you can change it later in Setup → System.
- Click Register. Auricast e-mails a confirmation link, good for 48 hours.
- Open the link. The screen carries on by itself within a few seconds, and playout starts.
Internet access is needed once for this. After a station is registered, or has once broadcast, nothing about registration can take it off air again.
Setup → Overview is the first place to look after setup. Notice the Health card: the version, each output and stream (a green dot means working), the library and its track count, the station folder, the as-aired log, backups and alert mail. The License card below it shows the plan.